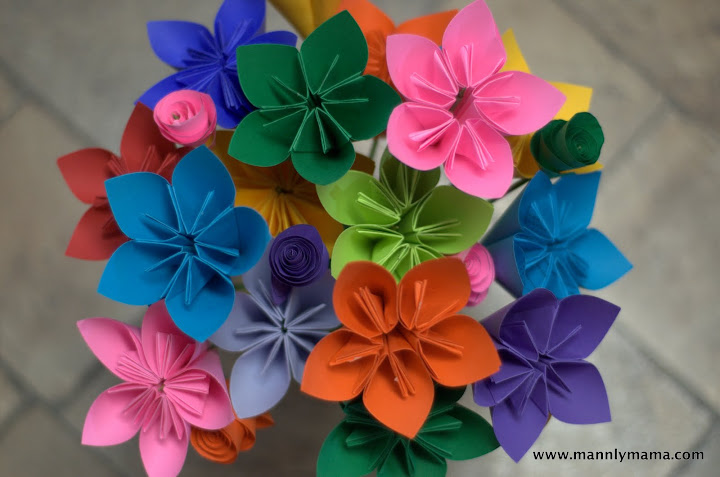
Paper flower tutorial

On Monday, we officially moved into our new offices at work. While everything is hectic, I wanted to use this time to redo my office motif. I decided to ditch the dinos and go for something more soothing. I got myself a groupon for dalidecals and will soon have a nice wall vinyl but I also wanted to make something. For our cover sheets in the printer, we have bright colored paper and I have saved mine for scratch paper for years. I decided I would reuse it to make a nice vase of flowers. Second part of my goal was to not buy anything to finish my project. I had the paper cutter, paper, glue and sticks from the yard*. Then I searched Pinterest for a tutorial. You probably noticed :). I finally found 2 types. A simple rose and a more origami petal version. Here are some tutorials for your enjoyment.

First, we have the daffodil version
Materials:
5- 4″x4″ paper squares
Elmer’s Glue
Close pins
Sticks(optional)

Hopefully the picture can get you there. If not, check out the tutorial over at Folding Trees. I found that 1) you want to do a 4×4 piece of paper. While 3×3 works, it was tough to hold together. And 2) get out your close pins. Those were a God send. You could use them to hold the petals while letting the glue dry and then together to make the flowers. I also ended up using BBQ skewers spray painted green to attach them to. While real sticks would have been fun, they weren’t easy to find right now…so I went with what I had. Crafting Maguyver I tell ya.

The rose was super easy. Cut a 3×3 or 4×4 square and then cut a spiral from that. Then start rolling it from the outside inwards. Voila. No glue needed. They stuck right on the end of the sticks. Now my tutorial came from this website. Her tutorial is lovely.
This is Captain Martha Stewart/Planet…welcome.
*I ended up spending $3 for spray paint for some BBQ skewers I already had for stems, but I digress.


Cute idea for something to go on my desk in my classroom!!